
You can set up your liqueur workshop with just a few items. They are not expensive and you can order them online from my Amazon shop: Homemade Liqueur Lab. These are my favorite tools, and I have divided them into the ones you need to make a liqueur and the ones that are nice to have.
The tools you need
- Jars 67 ounce - 2 liters: I use large canning jars to infuse herbs or fruit in the alcohol. They seal tightly and don't take much room in the cupboard. I usually make different liqueurs at the same time, so I need several jars. If you are an occasional liqueur maker, you can just use the bottle below.
- 1 gallon - 3 liters glass bottle: I use this bottle in the second part of the process, once I add the syrup. It is a transparent glass bottle, so I can check how the liqueur is progressing and whether it needs a good shake. The bottle needs a large neck, so you can remove the fruit, zest, spices or herbs without any problem once the liqueur is ready to be bottled. Personally, I have two of these large bottles.
- Vegetable peeler: to peel only the colored zest of lemons and oranges and leave the bitter white pith behind.
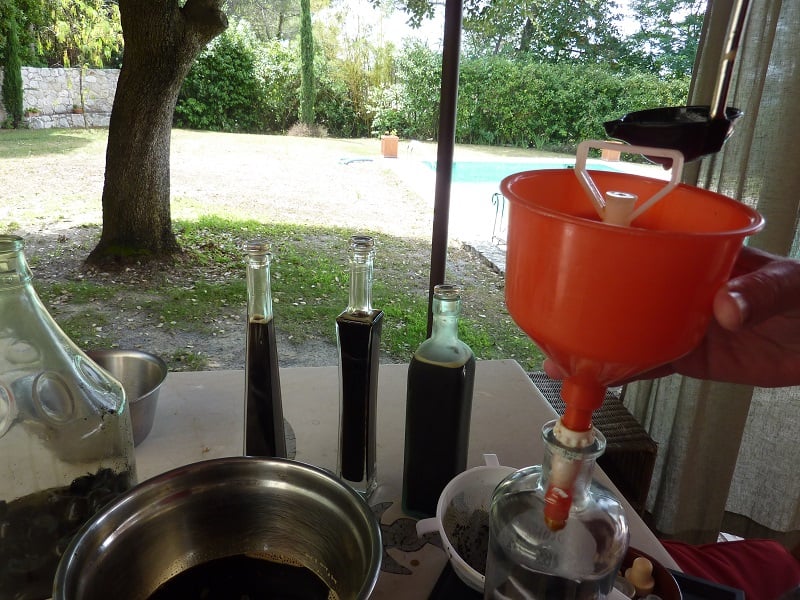
- Funnel with a wide and short stem: when you pour the liqueur from one bottle to another during the process, you need a funnel with a wide and short stem, so it doesn't get clogged with the ingredients infusing in the alcohol.
- Fine mesh strainer: to remove all the solids and particles from the liqueur before you bottle it.
- Measuring mugs: it is very important to use the exact proportion of syrup and alcohol, so measuring mugs are a must.
- Large saucepan, 3 quart: to boil the syrup. For the chocolate liqueur you need a large one, because the chocolate syrup rises a lot when it boils.
- Small glass bottles with lids: if you want to store the liqueurs in small bottles or give them as gifts to friends and family, these small bottles are ideal. The lids seal tightly and the bottles are light to carry.
The tools that are nice to have
- Auto-stop funnel: once the liqueur is ready, filtered and all the solid particles have been removed, I like to use an auto-stop funnel with a floating system that stops the liquid once the bottle is full. It is very difficult to gauge how much liquid fits in a bottle, and I often fill the funnel way too much. Instead of overflowing the bottle, the auto-stop funnel locks the stem automatically and the excess liquid stays in the funnel. You can then lift the funnel by its handle and move it to the next bottle without wasting any liqueur.
- Ladle with spout: I always use a ladle with a spout to take the syrup from the pan where I boiled it into the funnel. If your pan doesn't have a spout, this is the cleanest way to pour the syrup once it is cold.
- Vintage glass bottles: I love to keep my own liqueur collection in these vintage bottles, because they give my homemade liqueurs an extra wow factor.
- Shot glass set and/or small liqueur glasses: I serve the liqueur in small glasses so it can be slowly sipped and relished.
- Good Grips bottle brush: to clean all the bottles after each use. Some liqueurs can be very sticky and stain the glass, like the one made with walnut hulls.
- Rose ice cube stackable and ice cube with light: if you want to give your liqueur an extra festive look, you can make rose-shaped ice cubes or use the light-up ice cube to make your liqueur shine at night.
Leave a Reply