
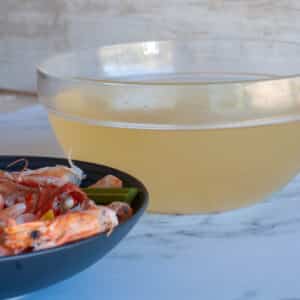
Brown stock, a cornerstone in the culinary world, is a flavorful liquid derived from gently simmering roasted bones, often accompanied by vegetables and herbs. This stock, which includes variations like beef stock and brown chicken stock, serves as the foundation for many dishes, providing depth and complexity. It's especially pivotal in classic sauces, such as the esteemed brown sauce or "sauce de viande".
Jump to:
The definition of stock highlights its role as the backbone of countless recipes.
While there are other types like white stock and white veal stock, the roasting process in brown stock gives it a distinctive hue and robust taste.
The difference between store-bought and homemade is palpable.
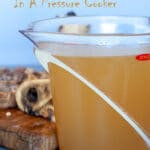
Making stock in your home kitchen, especially with the aid of modern tools like the pressure cooker, ensures a richer and clearer stock.
This homemade approach allows for customization and refinement, crucial for those aiming for specific stock flavors.
Sourcing quality bones, ideally from a local butcher, can significantly elevate the stock's flavor, emphasizing the importance of a good beef stock in cooking.
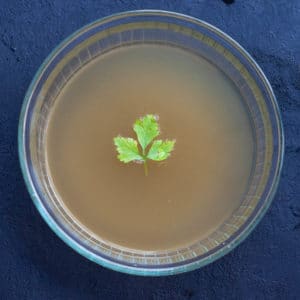
Once clarified and refined, brown stock can be transformed into a sophisticated consommé, showcasing its depth and elegance in a clear, concentrated form.
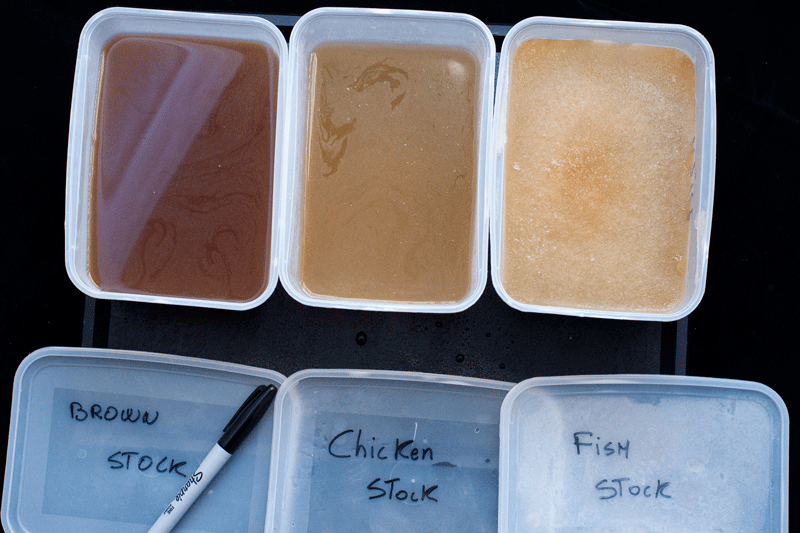
For more stock recipes you can read: chicken stock, fish stock and fish fumet.
Benefits of Homemade Stock
When you take the time to make your own brown beef stock at home, the advantages are clear:
- Richer Flavor and Depth: Homemade stock offers a depth of flavor that store-bought versions often can't match. The slow simmering of bones and aromatic ingredients infuses the liquid with a richness that elevates any dish it's added to.
- Control Over Ingredients: Making your own stock means you know exactly what's going into it. This gives you full control over the sodium content, allowing you to adjust the seasoning to your preference and dietary needs.
- No Unwanted Additives: Store-bought stocks can contain preservatives or other additives to extend their shelf life. With homemade stock, you get a pure, natural product without unnecessary ingredients.
By investing a bit of time in preparing your own brown broth, you're ensuring a healthier, tastier base for your culinary creations.
Ingredients
- Beef Bones: Opt for marrow, knuckle, neck, or shank bones. These specific bones with their connective tissue are rich in collagen, which gives the stock its body and gelatinous texture when cooled.
- Aromatic Vegetables: The classic trio of onions, carrots, and celery forms the base of many stocks and soups. They impart a depth of flavor that complements the richness of the beef.
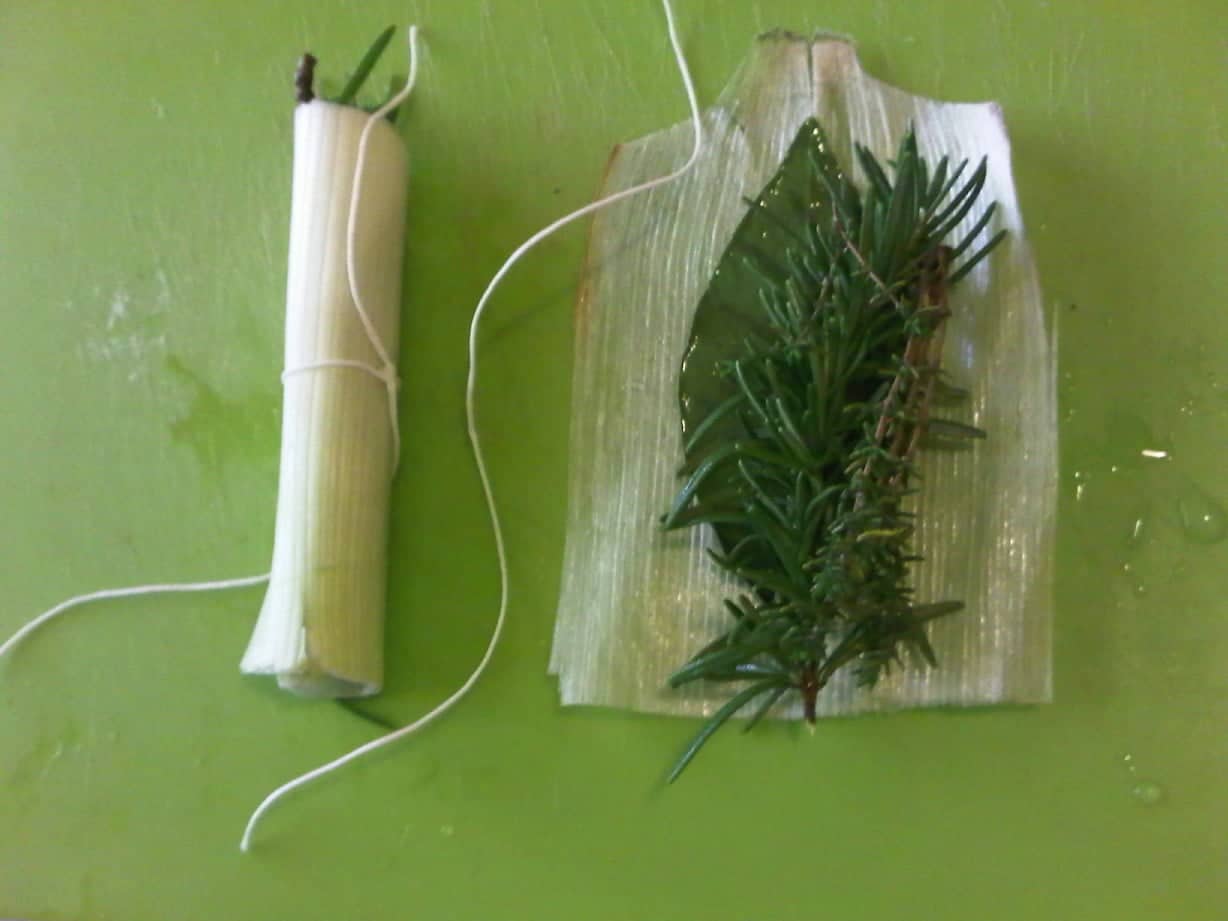
- Fresh Herbs: A Bouquet Garni is essential for infusing the stock with aromatic flavors. Traditionally made with thyme, rosemary, and bay leaves, it's wrapped in a leek leaf to keep everything together and make it easy to remove after cooking.
- Cold Water: Starting with cold water ensures even cooking and helps in extracting flavors gradually, resulting in a clearer stock.
- Peppercorns: These add a subtle heat and complex flavor.
- Salt: While it's essential for seasoning, be cautious with the amount, especially if you plan to reduce the stock later, as it can become overly salty.
Equipment
- Large Roasting Pan: Essential for browning the bones and vegetables, which is a crucial step in developing the deep, rich flavor of the stock.
- Large Stockpot: A sizeable pot is necessary to accommodate the bones, vegetables, and water, allowing them to simmer and infuse together.
- Strainer with fine sieve: To separate the solids from the liquid, discard fat and ensure a clear stock.
- Cheesecloth (optional): If you're aiming for an exceptionally clear stock, a cheesecloth can be used to filter out even the tiniest particles.
- Storage Containers: For storing the finished stock, whether you're refrigerating it for use within a few days or freezing for longer storage.
Pressure Cooker (optional but recommended): A pressure cooker can significantly reduce the cooking time while still extracting maximum flavor from the ingredients. It's especially handy if you're short on time but want to maintain the quality of your stock.
While you usually need to simmer the stock for 8 to 12 hours, you will be done in 30 minutes with a pressure cooker.
My pressure cooker has a lid that opens and closes very easily. If you want to read more about it you can check below.
My pressure cooker is a WMF Perfect Pressure Cooker (affiliate link to amazon). I like it because it is very easy to use.
If you want to know why I love it compared to others and what else I cook with it you can find my review here: Pressure Cooker
Instructions
Roasting the Bones and Vegetables
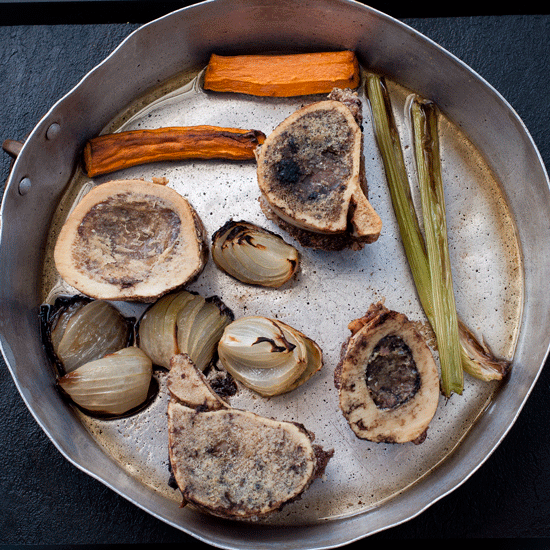
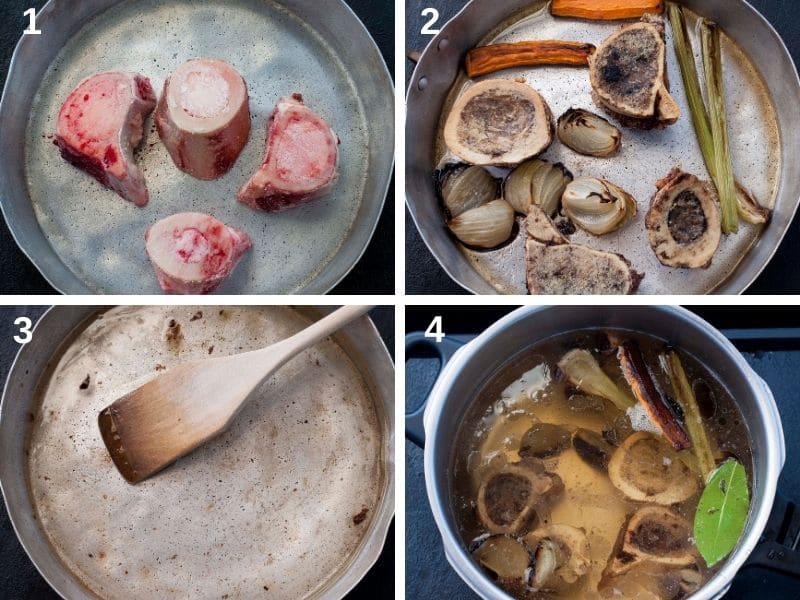
- Preparation for Deep Flavor: Begin by roasting the bone marrow in a preheated oven at 390 F (200 °C) to achieve a rich brown color. This step is crucial as it imparts the stock a deep, rich flavor. There's no need to add fat since the marrow will release itself as it roasts.
- Adding Aromatics: About halfway through the roasting process, introduce the onion, carrot, and celery to the pan. This ensures they caramelize and contribute their flavors to the stock.
Transferring to Stockpot and Deglazing
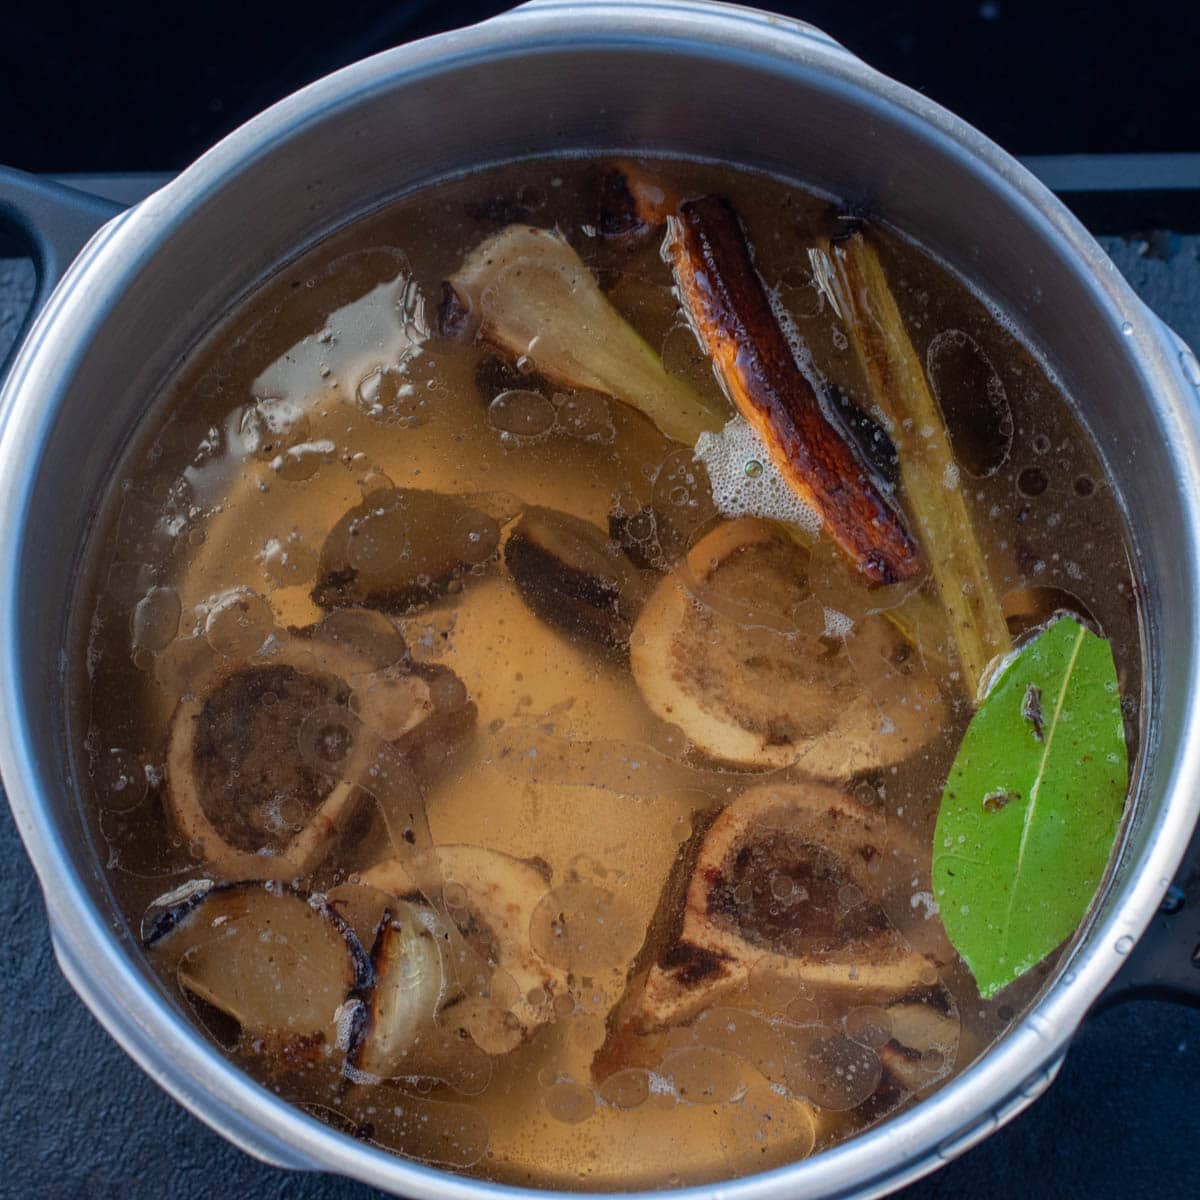
- Transfer to Pressure Cooker: Once the bones and vegetables are adequately roasted, move them to the pressure cooker. Add the Bouquet Garni, salt, and peppercorns to infuse the stock with aromatic herbs and seasoning.
- Deglazing for Maximum Flavor: Don't leave any flavor behind! Deglaze the brown bits from the bottom of the pan to capture all the caramelized bits. Pour this flavorful liquid and cold water into the pressure cooker, filling it up to ⅔ of its capacity.
Simmering the Stock
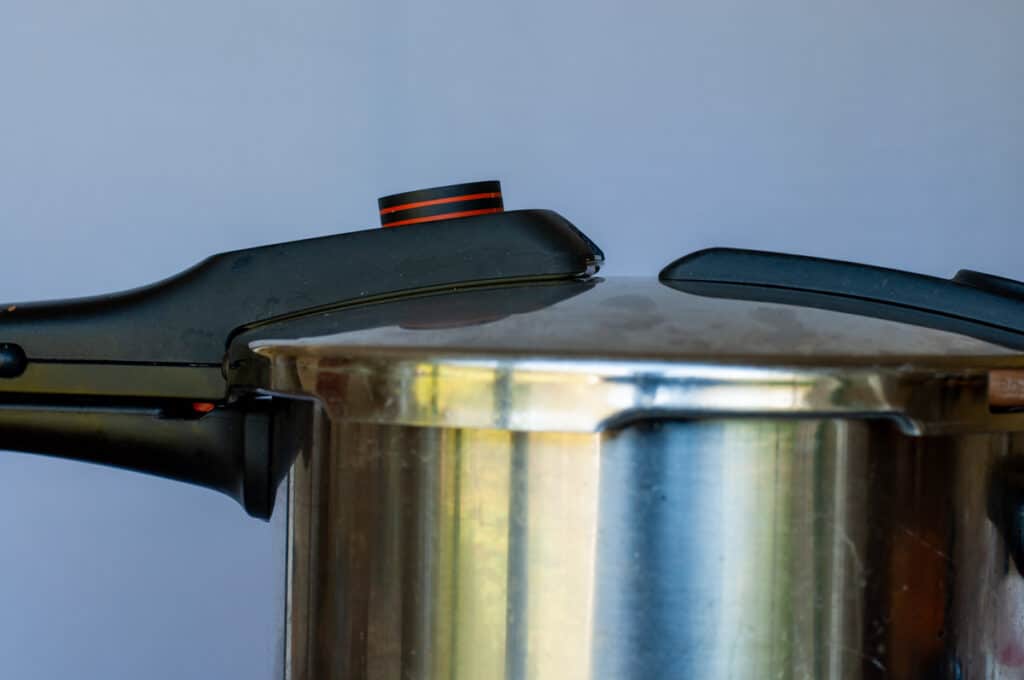
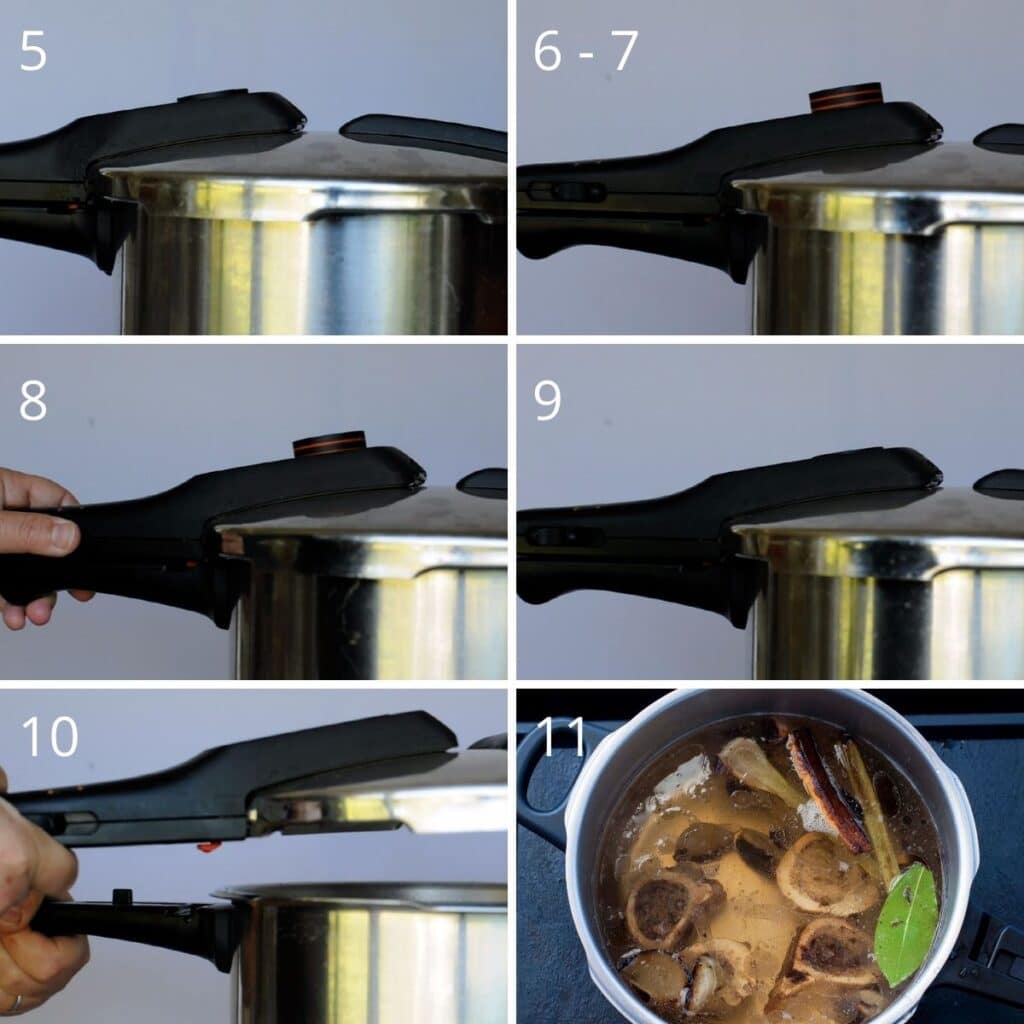
- Sealing the Pressure Cooker: Ensure the pressure cooker's lid is securely fastened and sealed to safely build pressure.
- Building Pressure: Place the cooker on the stove and heat it until the pressure valve rises to the second red line, indicating that the desired pressure level has been reached.
- Maintaining Pressure: Once the pressure is established, reduce the heat to medium and let the stock simmer for 30 minutes. It is essential to monitor the valve and ensure it remains in the correct position throughout this phase.
Hint: if you use a regular pan, simmer the stock for 8 to 12 hours. Make sure you have added enough water
Straining and Cooling
- Releasing Pressure: After the simmering time, carefully and gradually release the pressure from the cooker. The valve will begin to descend.
- Safety First: Wait until the pressure is fully released and the valve has dropped to its original position.
- Opening and Straining: Now, you can safely open the pressure cooker. Strain the stock to achieve a clear, impurity-free liquid, and allow it to cool rapidly for safe storage.
Ways to Use it
The rich and flavorful homemade brown beef stock you've prepared can elevate a variety of dishes. Here's how you can incorporate it into your culinary creations:
- Soups and Stews: The depth of flavor in your stock can transform simple soups into hearty meals. A prime example is the Romanesco soup, where the stock adds layers of taste, delighting every spoonful.
- Reductions and Sauces: A good stock is the backbone of many classic sauces. Use your brown beef stock to make reductions that can be drizzled over dishes. For instance, it can be the base for a luscious gravy to accompany pork with apples, enhancing the dish's overall taste.
- Braising Meats: Braising is all about slow-cooking in liquid to tenderize the meat and infuse it with flavor. Your homemade stock is perfect for dishes like Daube Provençal, where the meat absorbs the stock's richness, making it succulent and flavorful.
- Risottos and Grain Dishes: Risotto, a classic Italian dish, requires a flavorful liquid to achieve its creamy consistency. Using your brown beef stock in dishes like Risotto alla Milanese will give it the right texture and a depth of flavor that's hard to achieve with store-bought stocks.
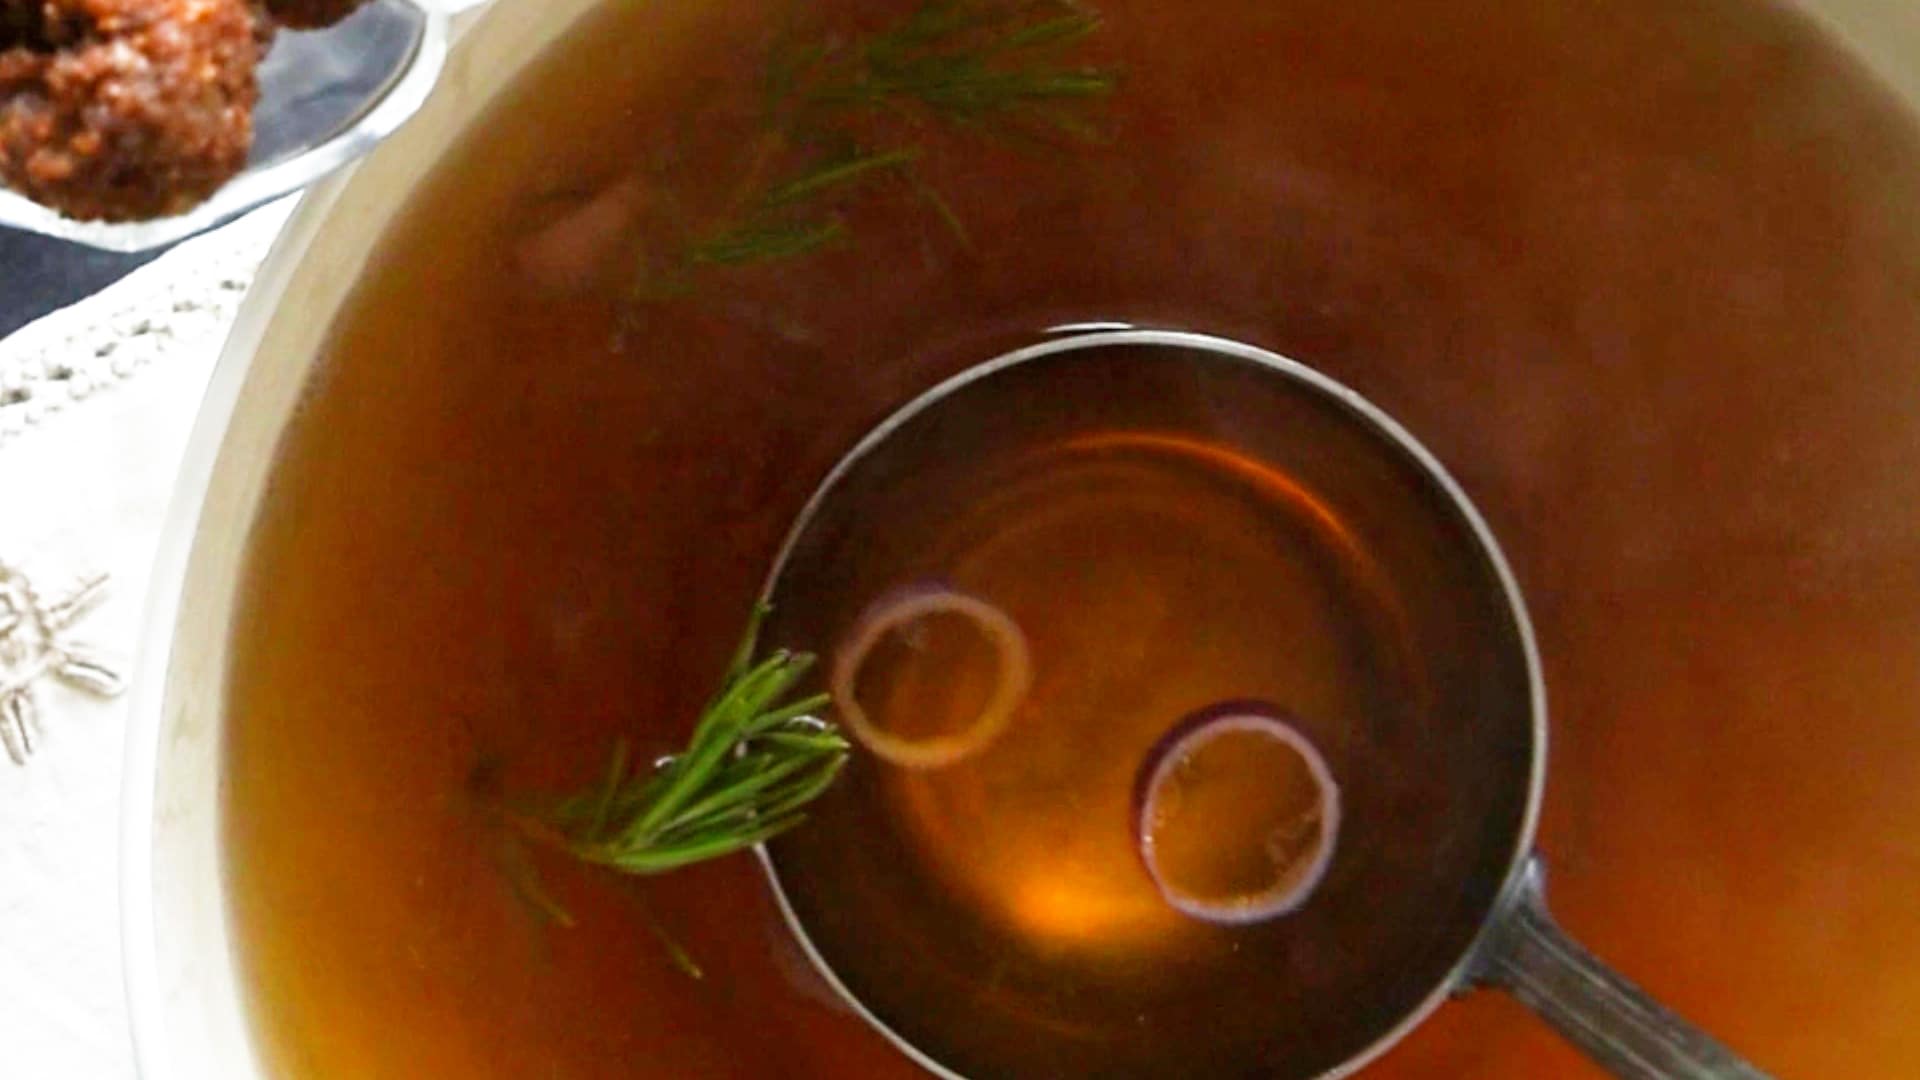
- Consommé: This clear soup is made by clarifying a rich stock, resulting in a transparent liquid that's packed with flavor. Using your homemade bone broth as the base for a consommé ensures a pure, deep taste that's both refreshing and savory. It's a sophisticated dish showcasing the stock's purity and essence.
Incorporating your homemade stock into these dishes will undoubtedly showcase the effort and care you put into making it, ensuring every meal is memorable.
Storage
Once you've crafted your rich and flavorful brown beef stock, it's essential to store it properly to maintain its quality and extend its shelf life.
Refrigeration Guidelines: After cooling the stock to room temperature, transfer it to airtight containers and refrigerate.
It should be used within 3-4 days for the best flavor and safety.
Always ensure to keep it in the coldest part of your fridge.
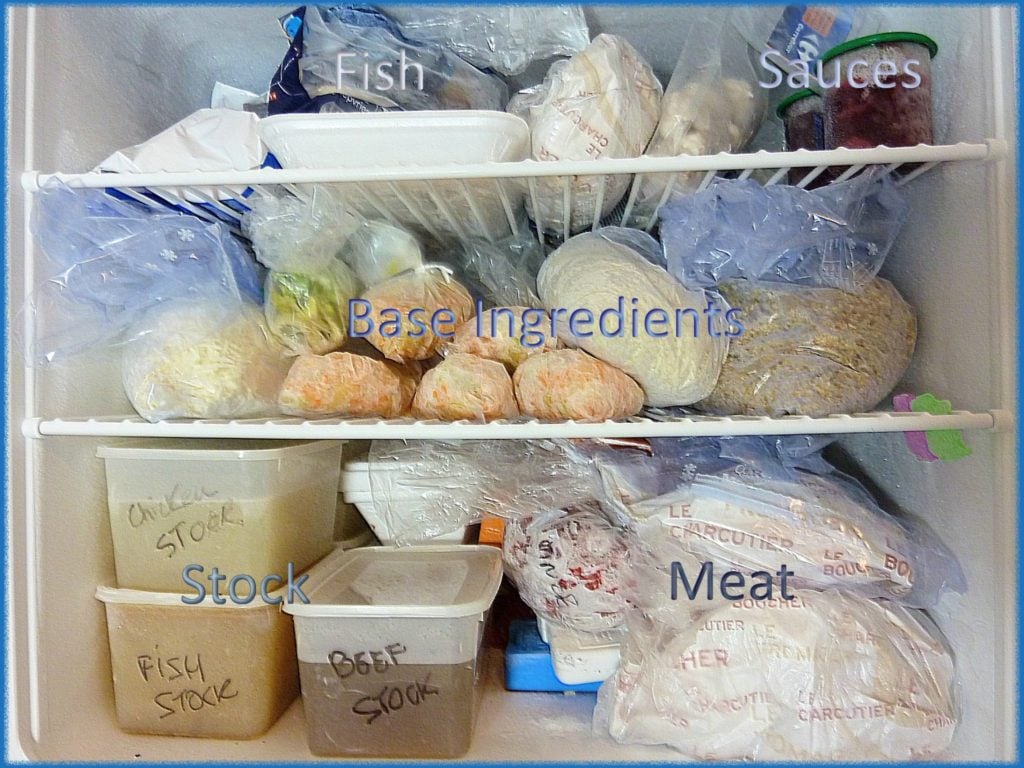
Freezing for Longer Storage: Freezing is an excellent option if you don't plan on using the stock within a few days.
Before freezing, portion the stock into manageable amounts, considering how much you typically use in recipes.
This way, you won't need to thaw more than necessary.
Tips for Portioning and Storing in Ice Cube Trays: For those who often need small amounts of stock for sautéing or deglazing, pouring the cooled stock into ice cube trays and freezing is a handy trick.
Once frozen, pop out the stock cubes and store them in freezer bags.
This method allows for quick and easy access to small portions of stock without the need to thaw a larger amount.
Remember, when thawing frozen stock, it's best to do so in the refrigerator or by using the defrost function on a microwave.
Always reheat the stock to a boil before using it to ensure safety.
If you are interested to know what other prep food I freeze, you can read about it here in the article: Once a Month Freezer Meal Prep
The best part at the end
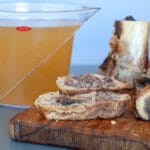
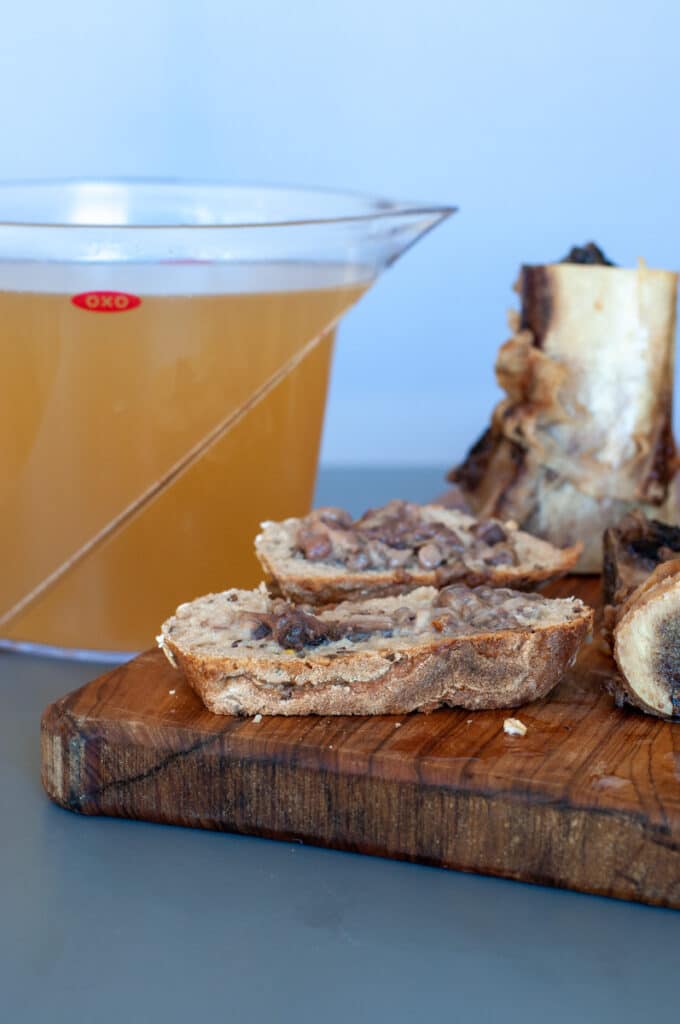
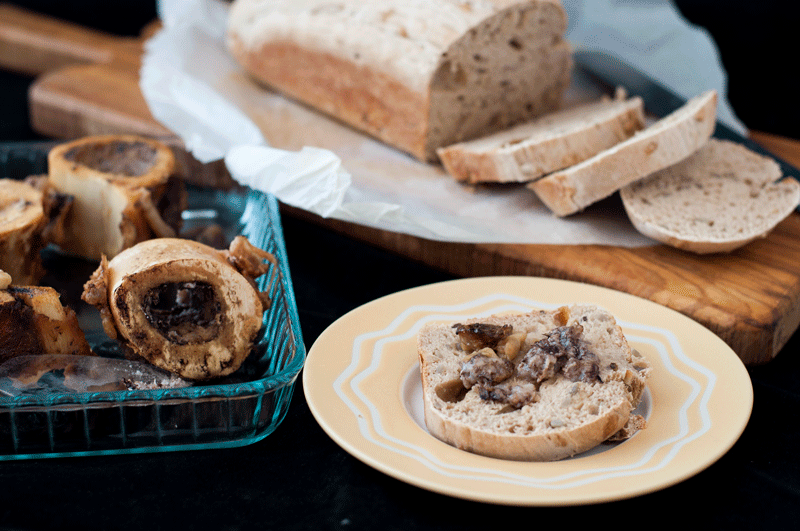
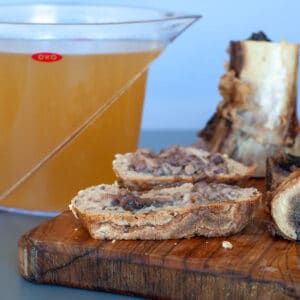
But the best part of making this stock is the end: eating the marrow on a toasted slice of bread.
It is one of my favorite bites, but it is loaded with calories. Fortunately, my maternal guilt keeps me away from temptation.
My 11 years old son Francesco loves it so much that he finishes it in a flash. I would feel too bad to take it away from him.
If you are making this Homemade Brown Beef Stock From Scratch, leave your comment below I would like to hear from you. You can find more delicious ideas if you FOLLOW ME on Facebook, YouTube, Pinterest and Instagram or sign up to my newsletter.
📋 Homemade Brown Beef Stock From Scratch
Verified Culinary AuthorityVideo
Ingredients
- 2 large bone marrow with or without meat
- 1 Bouquet Garni : leek leaf wrapped around rosemary, bay leaf and thyme
- 1 large carrot
- 1 onion
- 1 stalk of celery
- 1 tablespoon sea coarser salt
- 5 peppercorns
- fresh water
Instructions
Roasting the bones and the vegetables
- To make that nice brown colour the bone marrow has to roast in a very hot oven for 40 minutes at 390 F - 200 °C .
- Make a Bouquet Grani by wrapping rosemary, sage, thyme, and bay leaf into a leek leaf
- Halfway through add the onion, carrot and celery.
- Once the ingredients are roasted, transfer them to the pressure cooker and add the Bouquet Garni, and some salt and peppercorn.
- Deglaze the roasting pan to make sure all the roasting flavors are added to the stock and pour the water into the pressure cooker. Fill the pressure cooker to ⅔ of its height.
Making the stock in the pressure cooker
- Close the pressure cooker, make sure it is sealed.
- Put it on the heat so the pressure builds up with the heat. The pressure valve will rise to the second red line
- Once the pressure is built, let it cook for 30 minutes at medium heat. Make sure the valve stays up
- After 30 minutes, gradually release the pressure from the pan. The valve will start to go down
- Once the pressure is completely released and the valve is down, you can open the pan
- Remove the bones and the vegetables
- Don't miss out, you can eat the warm marrow on a toasted slice of sourdough bread
Filtering the stock
- The stock's temperature has to drop in order for the fat to solidify. If it is winter you can leave the pressure cooker(still sealed) outside, otherwise just keep it in the fridge until is cold enough.
- Filter the stock with a percolated coffee filter or a kitchen paper towel, and the stock is ready to be put into their freezing containers or use immediately.
- To defrost, microwave the container for 5 minutes, and then use as instructed in your recipe.
Notes
- when you buy the bone marrow, make sure there is enough marrow inside. The marrow is white when uncooked.
- never fill the pressure cooker more than ⅔ of its height
- if you don't have a pressure cooker, boil it for 2 hours
- wait for it to cool down before filtering it as the fat becomes more solid and it is easier to filter

Nicola @ Happy Healthy Motivated
I make stock whenever I have a few leftover bones, but yours sounds so, so much better! I'm not really into it, but my boyfriend loves eating bone marrow, too. I bet it tastes so much better after it's been simmering away like this!
Laura
Thanks, I love it. I could eat them all
Anna
Such a great idea with freezing it! My other half is obsessed with brown stock, so he's going to love that!
Laura
Thanks, he is going to love it
Marie - Not Enough Cinnamon
I'm really not a fan of eating the actual bone marrow but it does taste fantastic in a homemade stock. Brings so much flavor, I love it!
Laura
Oh, I wish I could come to your house then so I could eat it
Leslie
I would love to try this. Using the leek leaf as the bouquet garni wrap is genius.
Laura
Thanks, it does add to the flavour
jacquee | i sugar coat it!
This reminds me of one my grandmother makes - so flavourful and so simple to make! What's not to love!
Laura
Cozy brown stock !